This is a regular update my Now page. I publish them as a blog post for archive purposes. You can also view all my past now entries.
Since I shifted to working remotely because of the pandemic, I've been looking for ways to improve my home office setup and daily workflows. One of the improvements was finding an easy way to let my wife know when I was in meetings and for how long. Sure, I could just share my calendar with her, but I wanted something more glanceable and always visible.
Initially, I was considering something like the conferencing displays fancy offices at the door of every conference room that show the room's schedule. But after a quick search, I discovered that they were expensive, and most were not sold to consumers in most cases.
Looking for a plan B, I learned that a whole category of iPad apps exists for this particular need. They all try to turn the iPad into a pseudo-conferencing room display. So, I immediately went to our tech graveyard drawer and found an old original iPad mini in good condition. Now the challenge was mounting it to the wall while not looking hideous.
Mounting the iPad to the wall
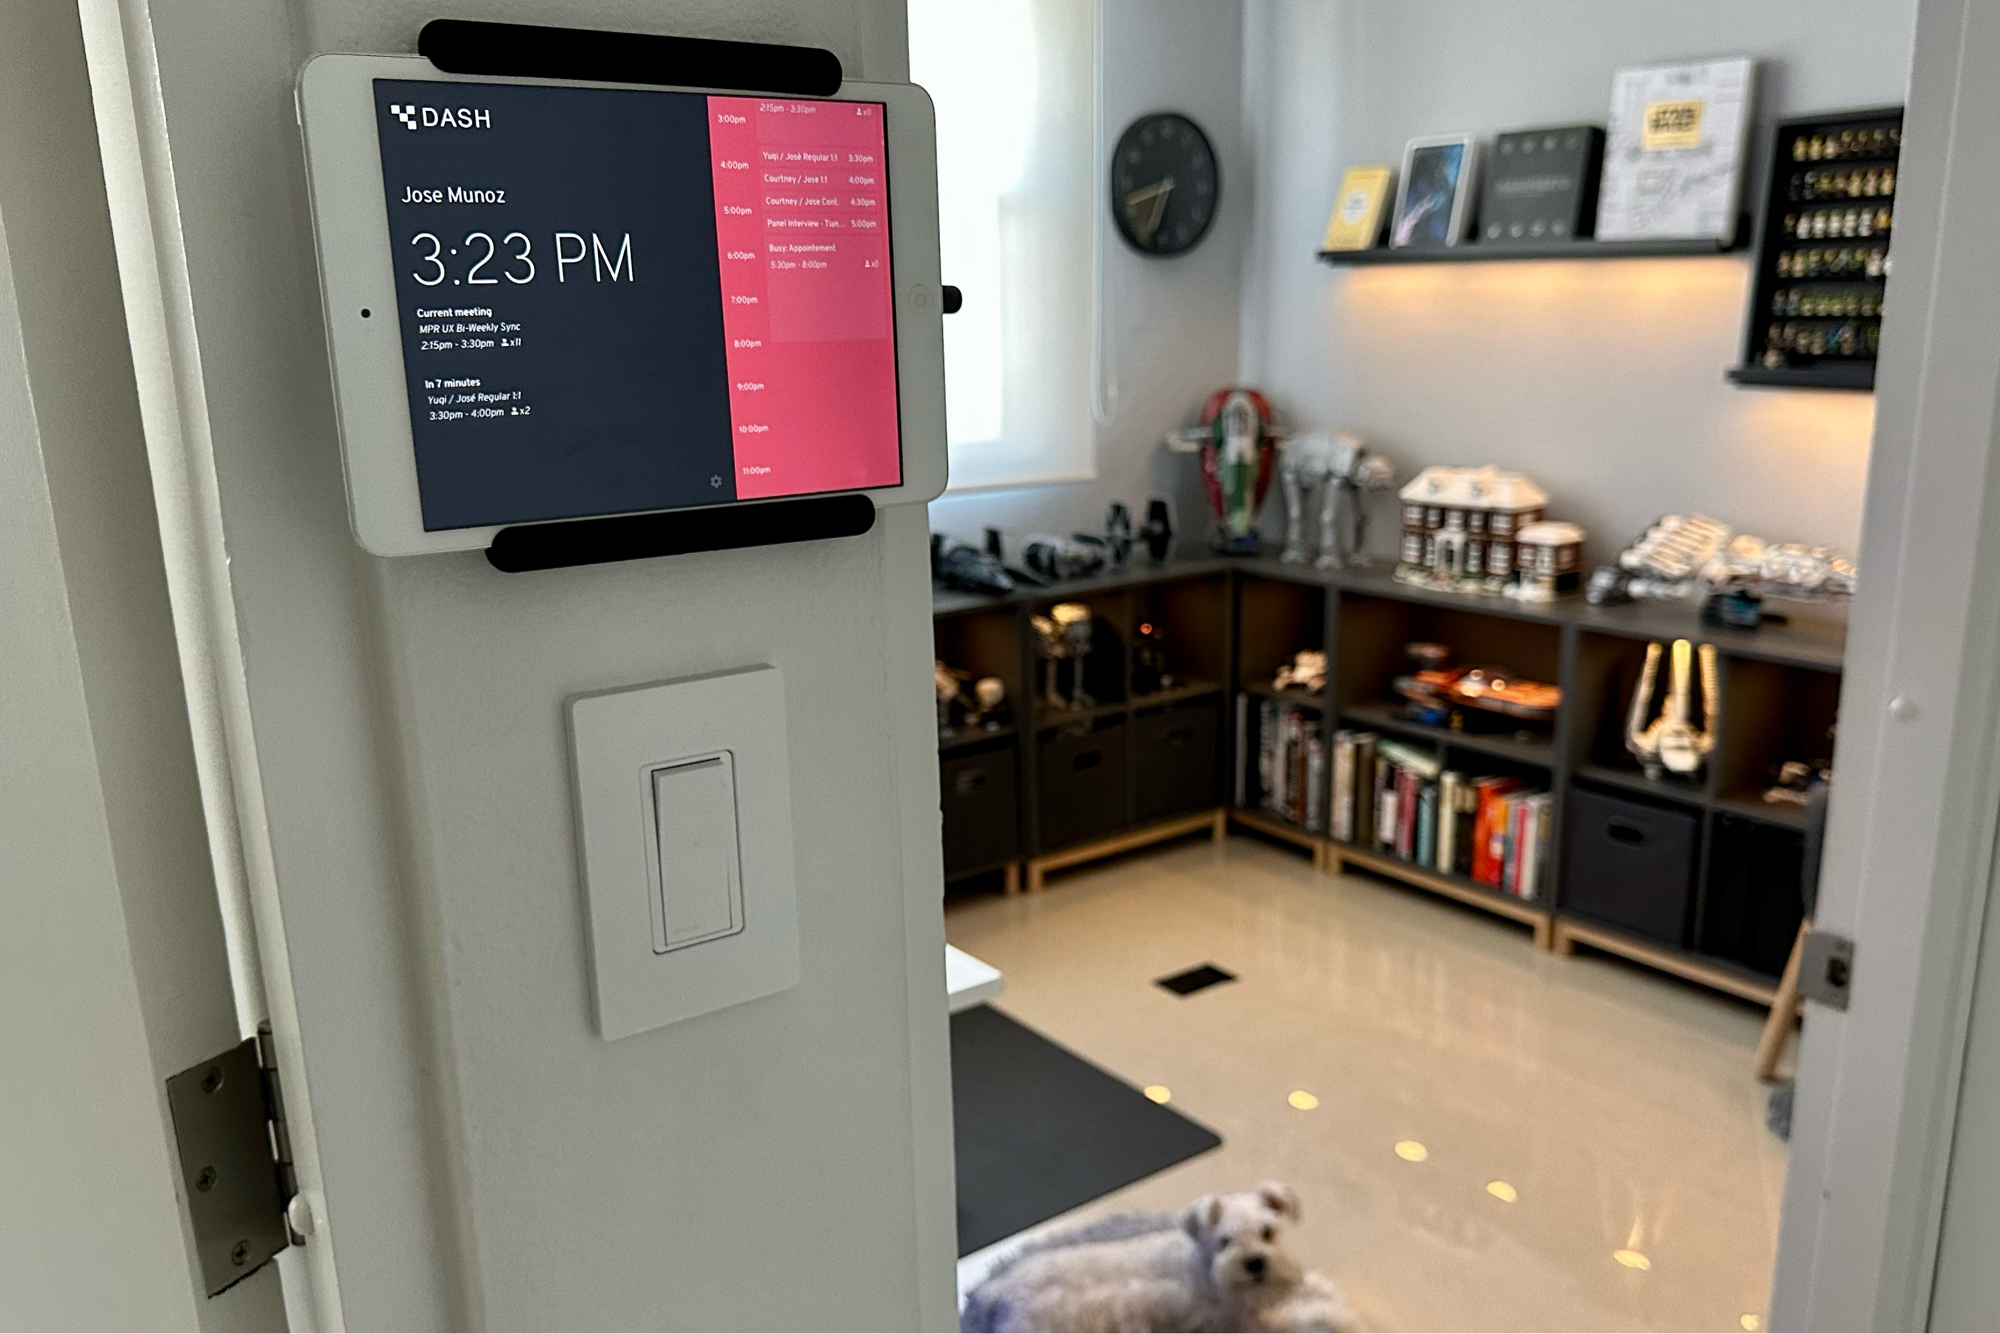
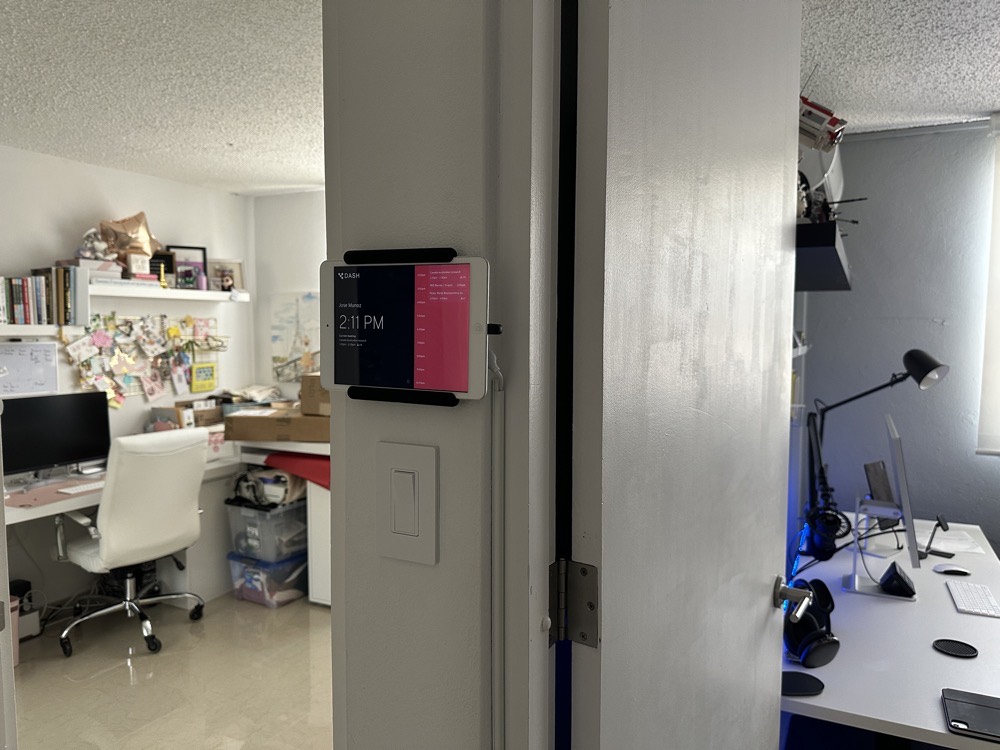
I mounted the iPad on a small wall between my wife and my office. The setup needed to look presentable even when not in use because our apartment is small, and most guests would see the iPad.
For the actual mount, I decided to go with the Elago Home Hub because of its minimal looks. Also, unlike similar products, it's designed to work with any size iPad. Plus, it comes in multiple colors; I chose black because it contrasts better with the white iPad Mini. Most of the other products in this category needed to be more bulky or required in-wall installation.
I used Command Strips to attach it to the wall instead of drilling. This way, I could readjust the strips if I did not like the result or the placement. I love these strips and use them to hang almost everything around the house. One minor hiccup is that I had to use a little bit of Gorilla Glue because the rubber of the Home Hub was not adhering to the Command Strips.
The final result was perfect and left me enough space between the wall and iPad for the charging cables.
Getting power to the iPad
I didn’t want to worry about charging, so the iPad had to be permanently hooked to power. But with no outlets nearby, this was going to be tricky. Ideally, you would pass the cable through the wall, but walls in Puerto Rico are made of solid concrete; good luck with that, lol.
To solve that, I got a pair of USB extension cables, and daisy chained them so they were long enough to reach the nearest outlet. To hide the wires, I got a pack of cord hiders to cover the cable. I had to paint the cord hiders gray to blend them with my office walls.
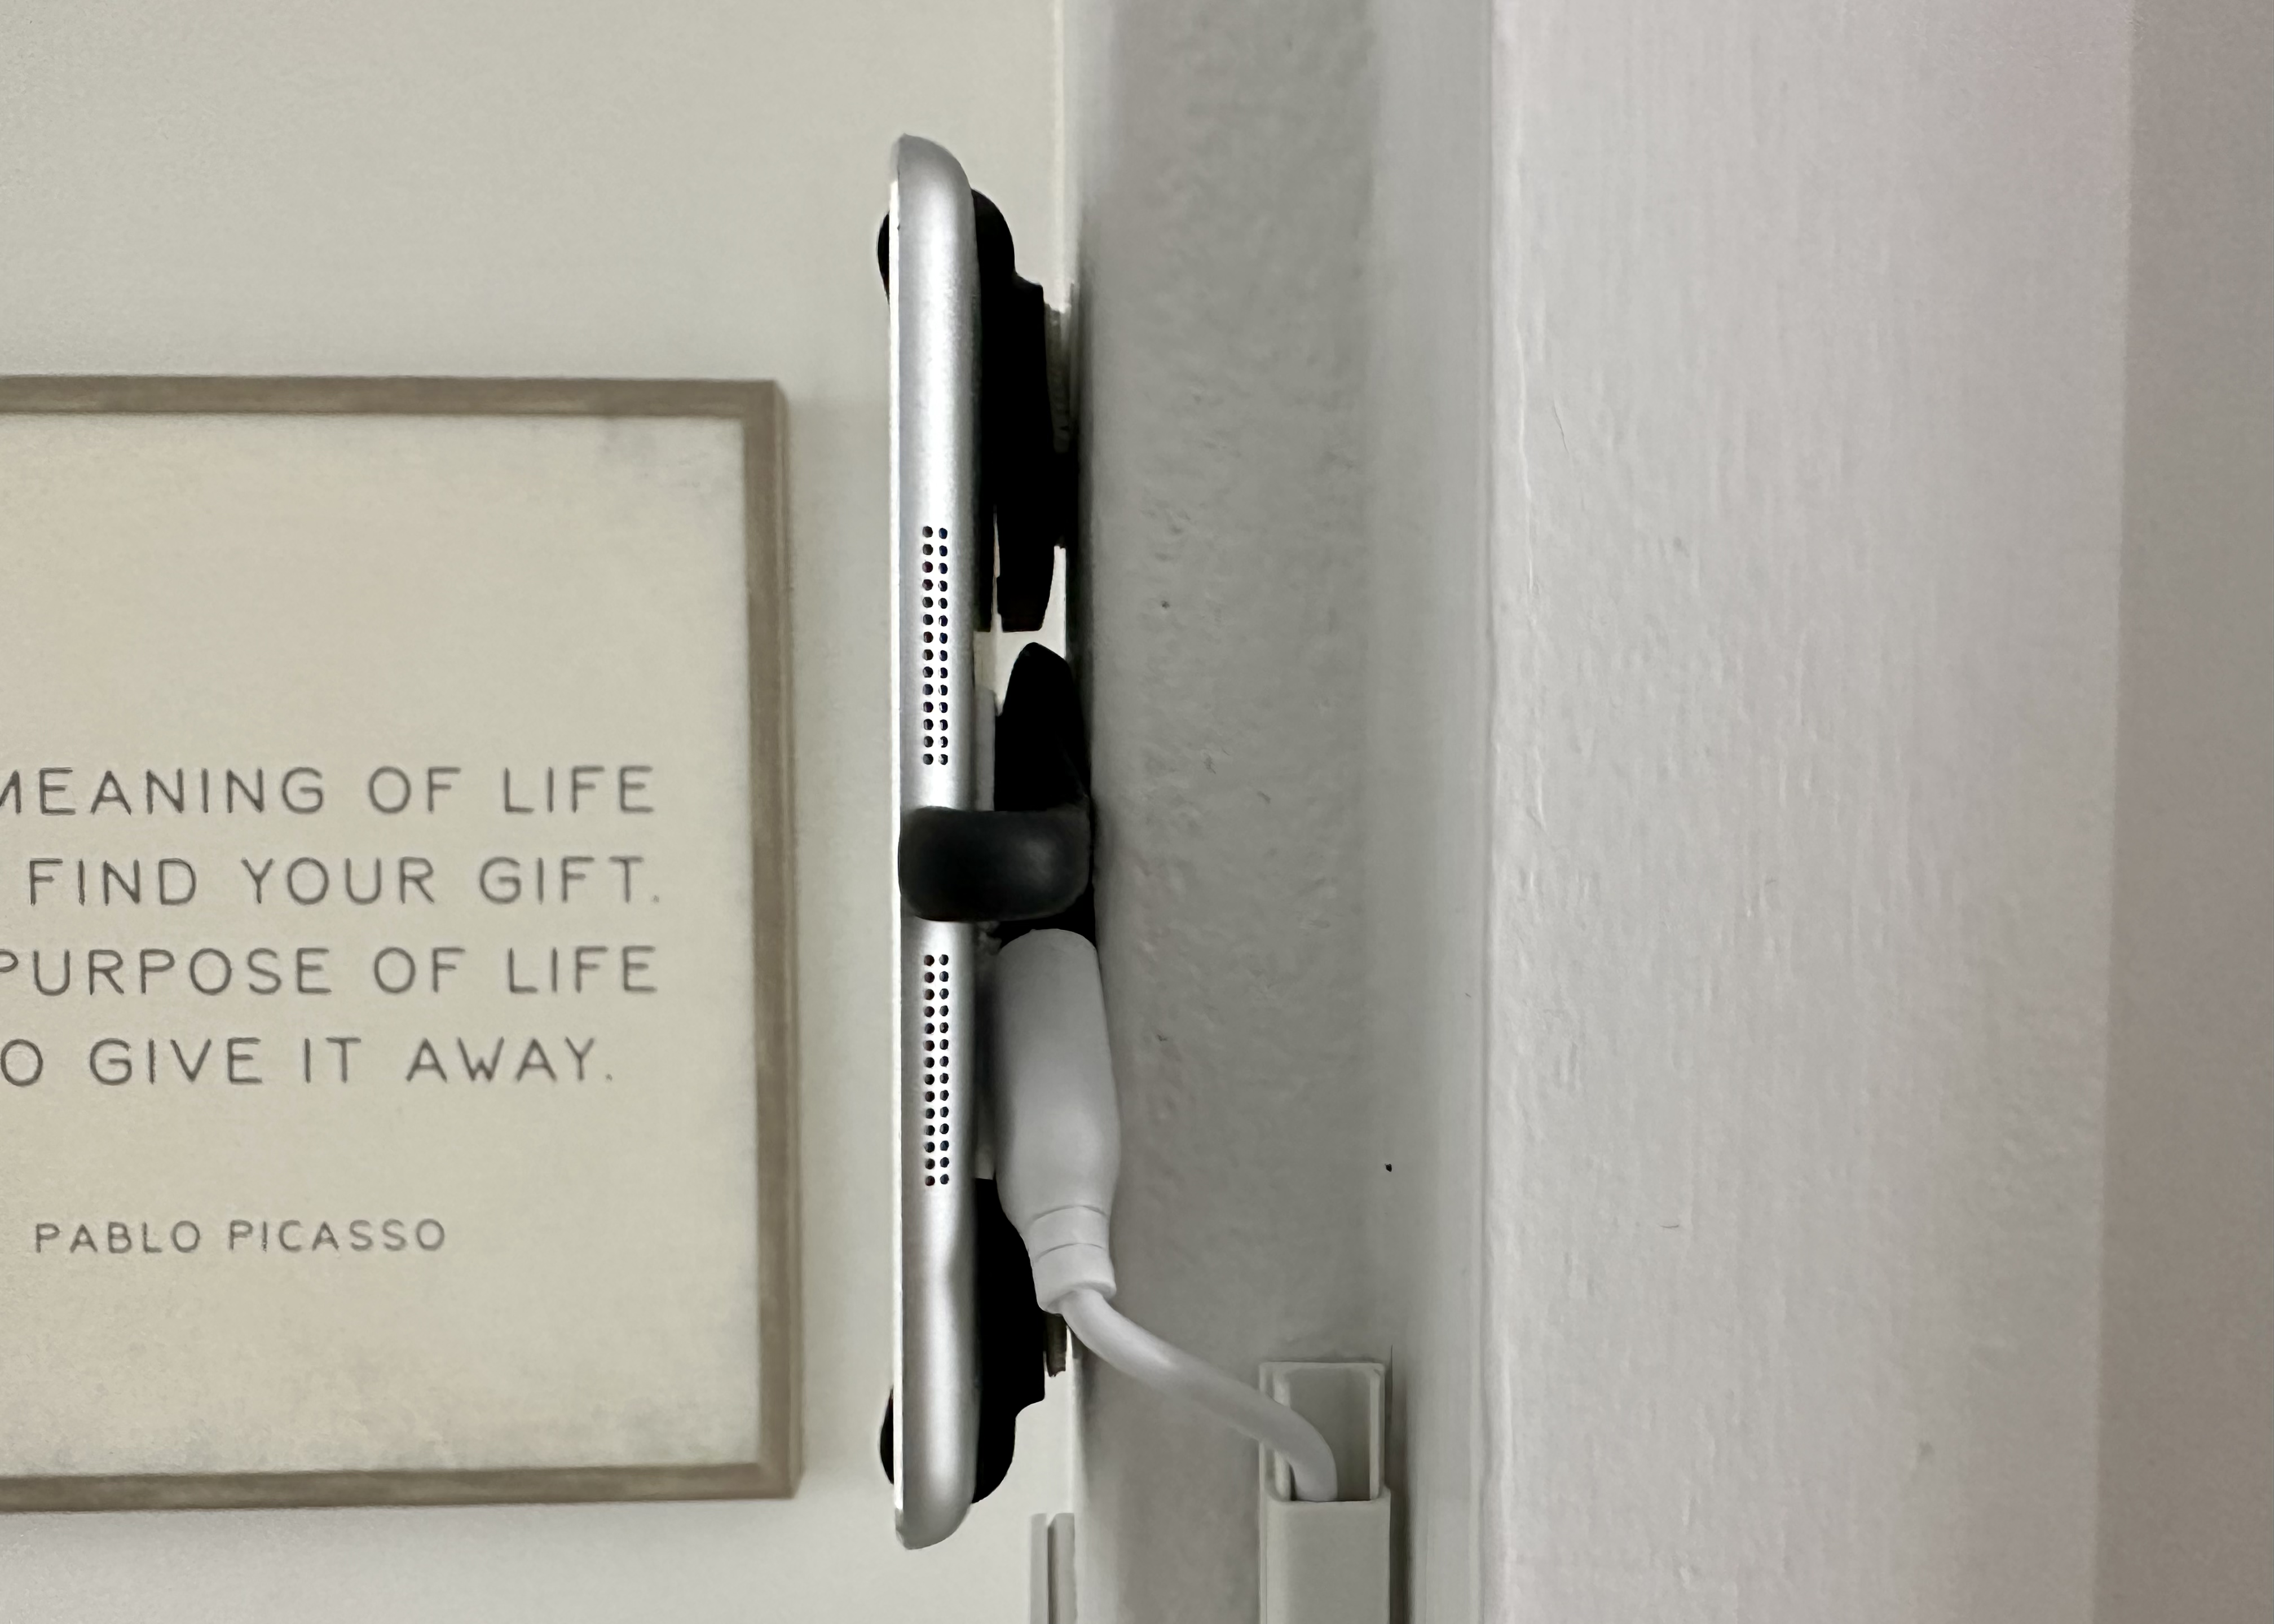
For the iPad charger, I went with a 90 degrees USB to lightning cable. The angle helped with the cable not sticking out too much from the iPad. The cable was also flat, fitting the small gap between the iPad and the wall.
I was very happy with the final setup. Although it needed some workarounds, it looked as sleek as possible with almost no cables in sight.
Automating the charging
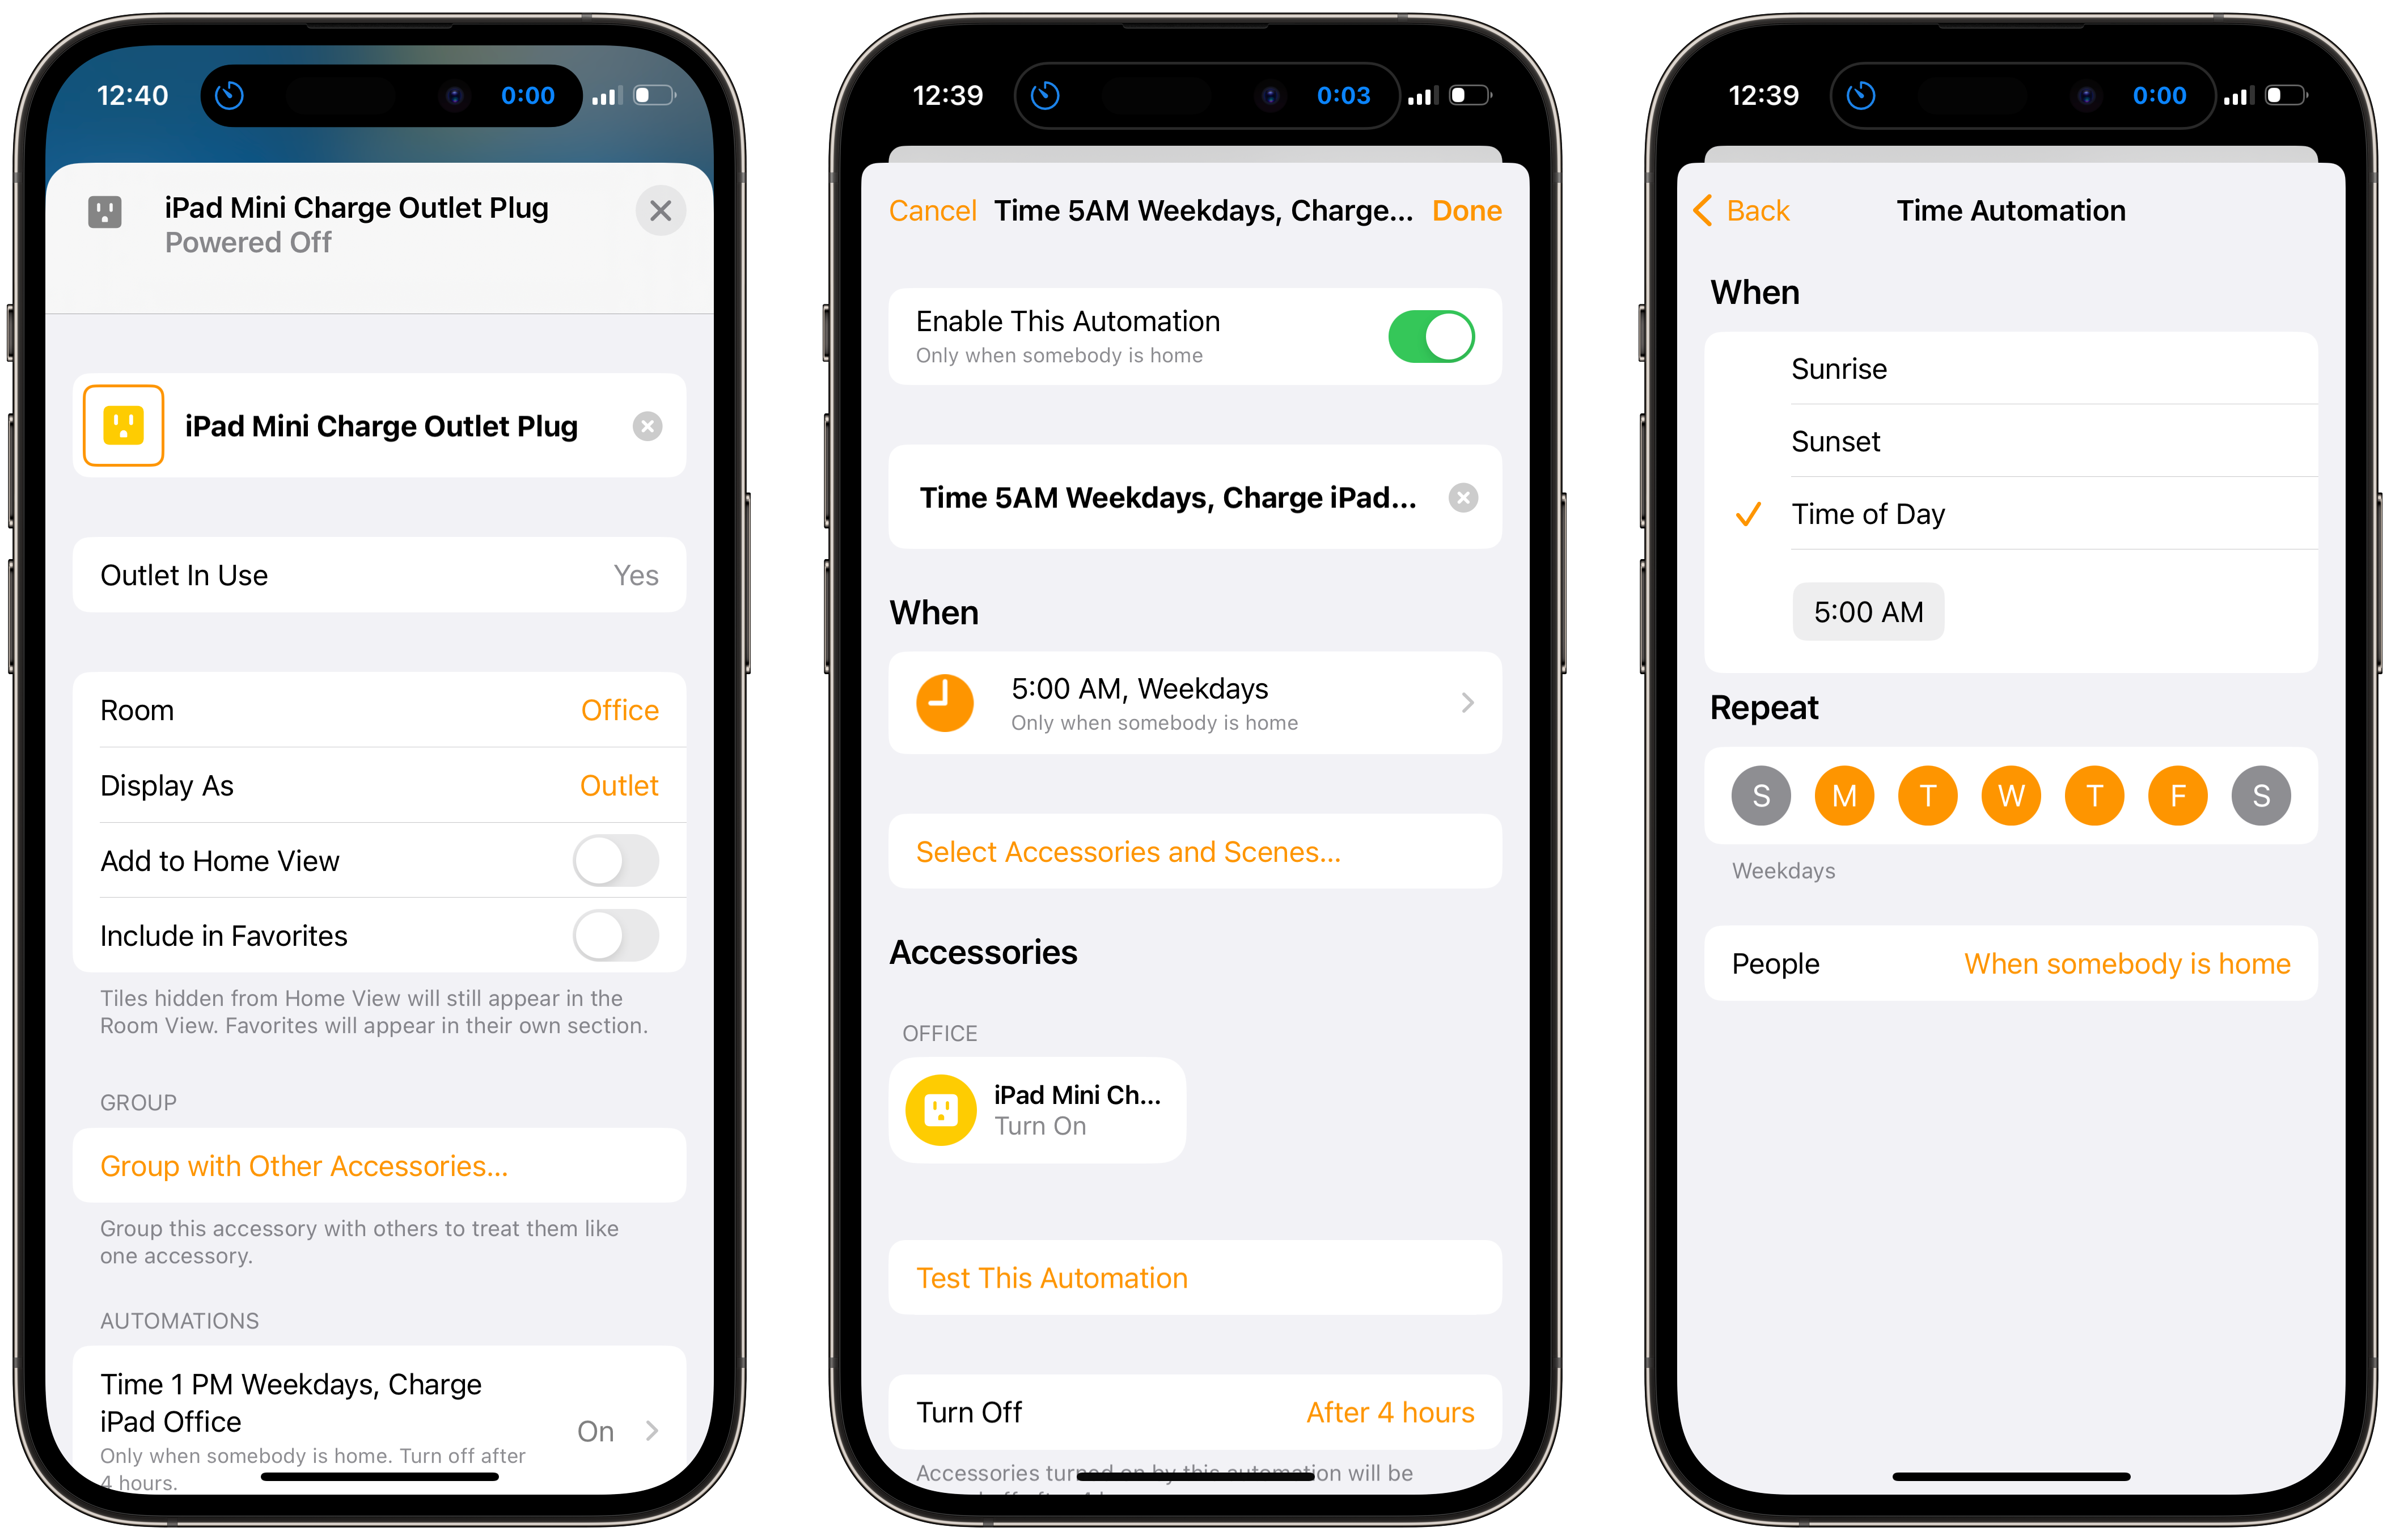
For the charging, I got to have fun and apply a bit of automation with smart home accessories. I repurposed one of my Vocolinc Homekit smart plugs and hooked it to the iPad's charger. That way, I could control when the charging from any device.
Then, I created time-based automation in the Homekit app to control the Vocolinc plug. I set it to run at 5 AM to run only on weekdays. I also set it up to turn off automatically after 4 hours the automation starts. That gives me enough charge for the day and prevents the battery from dying. As an extra layer of control, I can select for it only to run when someone is home. This can be useful if we are on vacation, for example.
These were all the materials and devices I used to mount and power the iPad mini:
- iPad Mini 1st Gen
- Elago Home Hub Mount
- 90-degree USB to lightning cable
- USB Extension Cable
- Cord Hider
- Gorilla super glue
- Command Strips
- Vocolinc Homekit
The Software
I thought this part would be the easiest, but it was the opposite. Because the iPad Mini I had was an original first model, the latest iOS it supported was iOS 9. That limited the options available for apps.
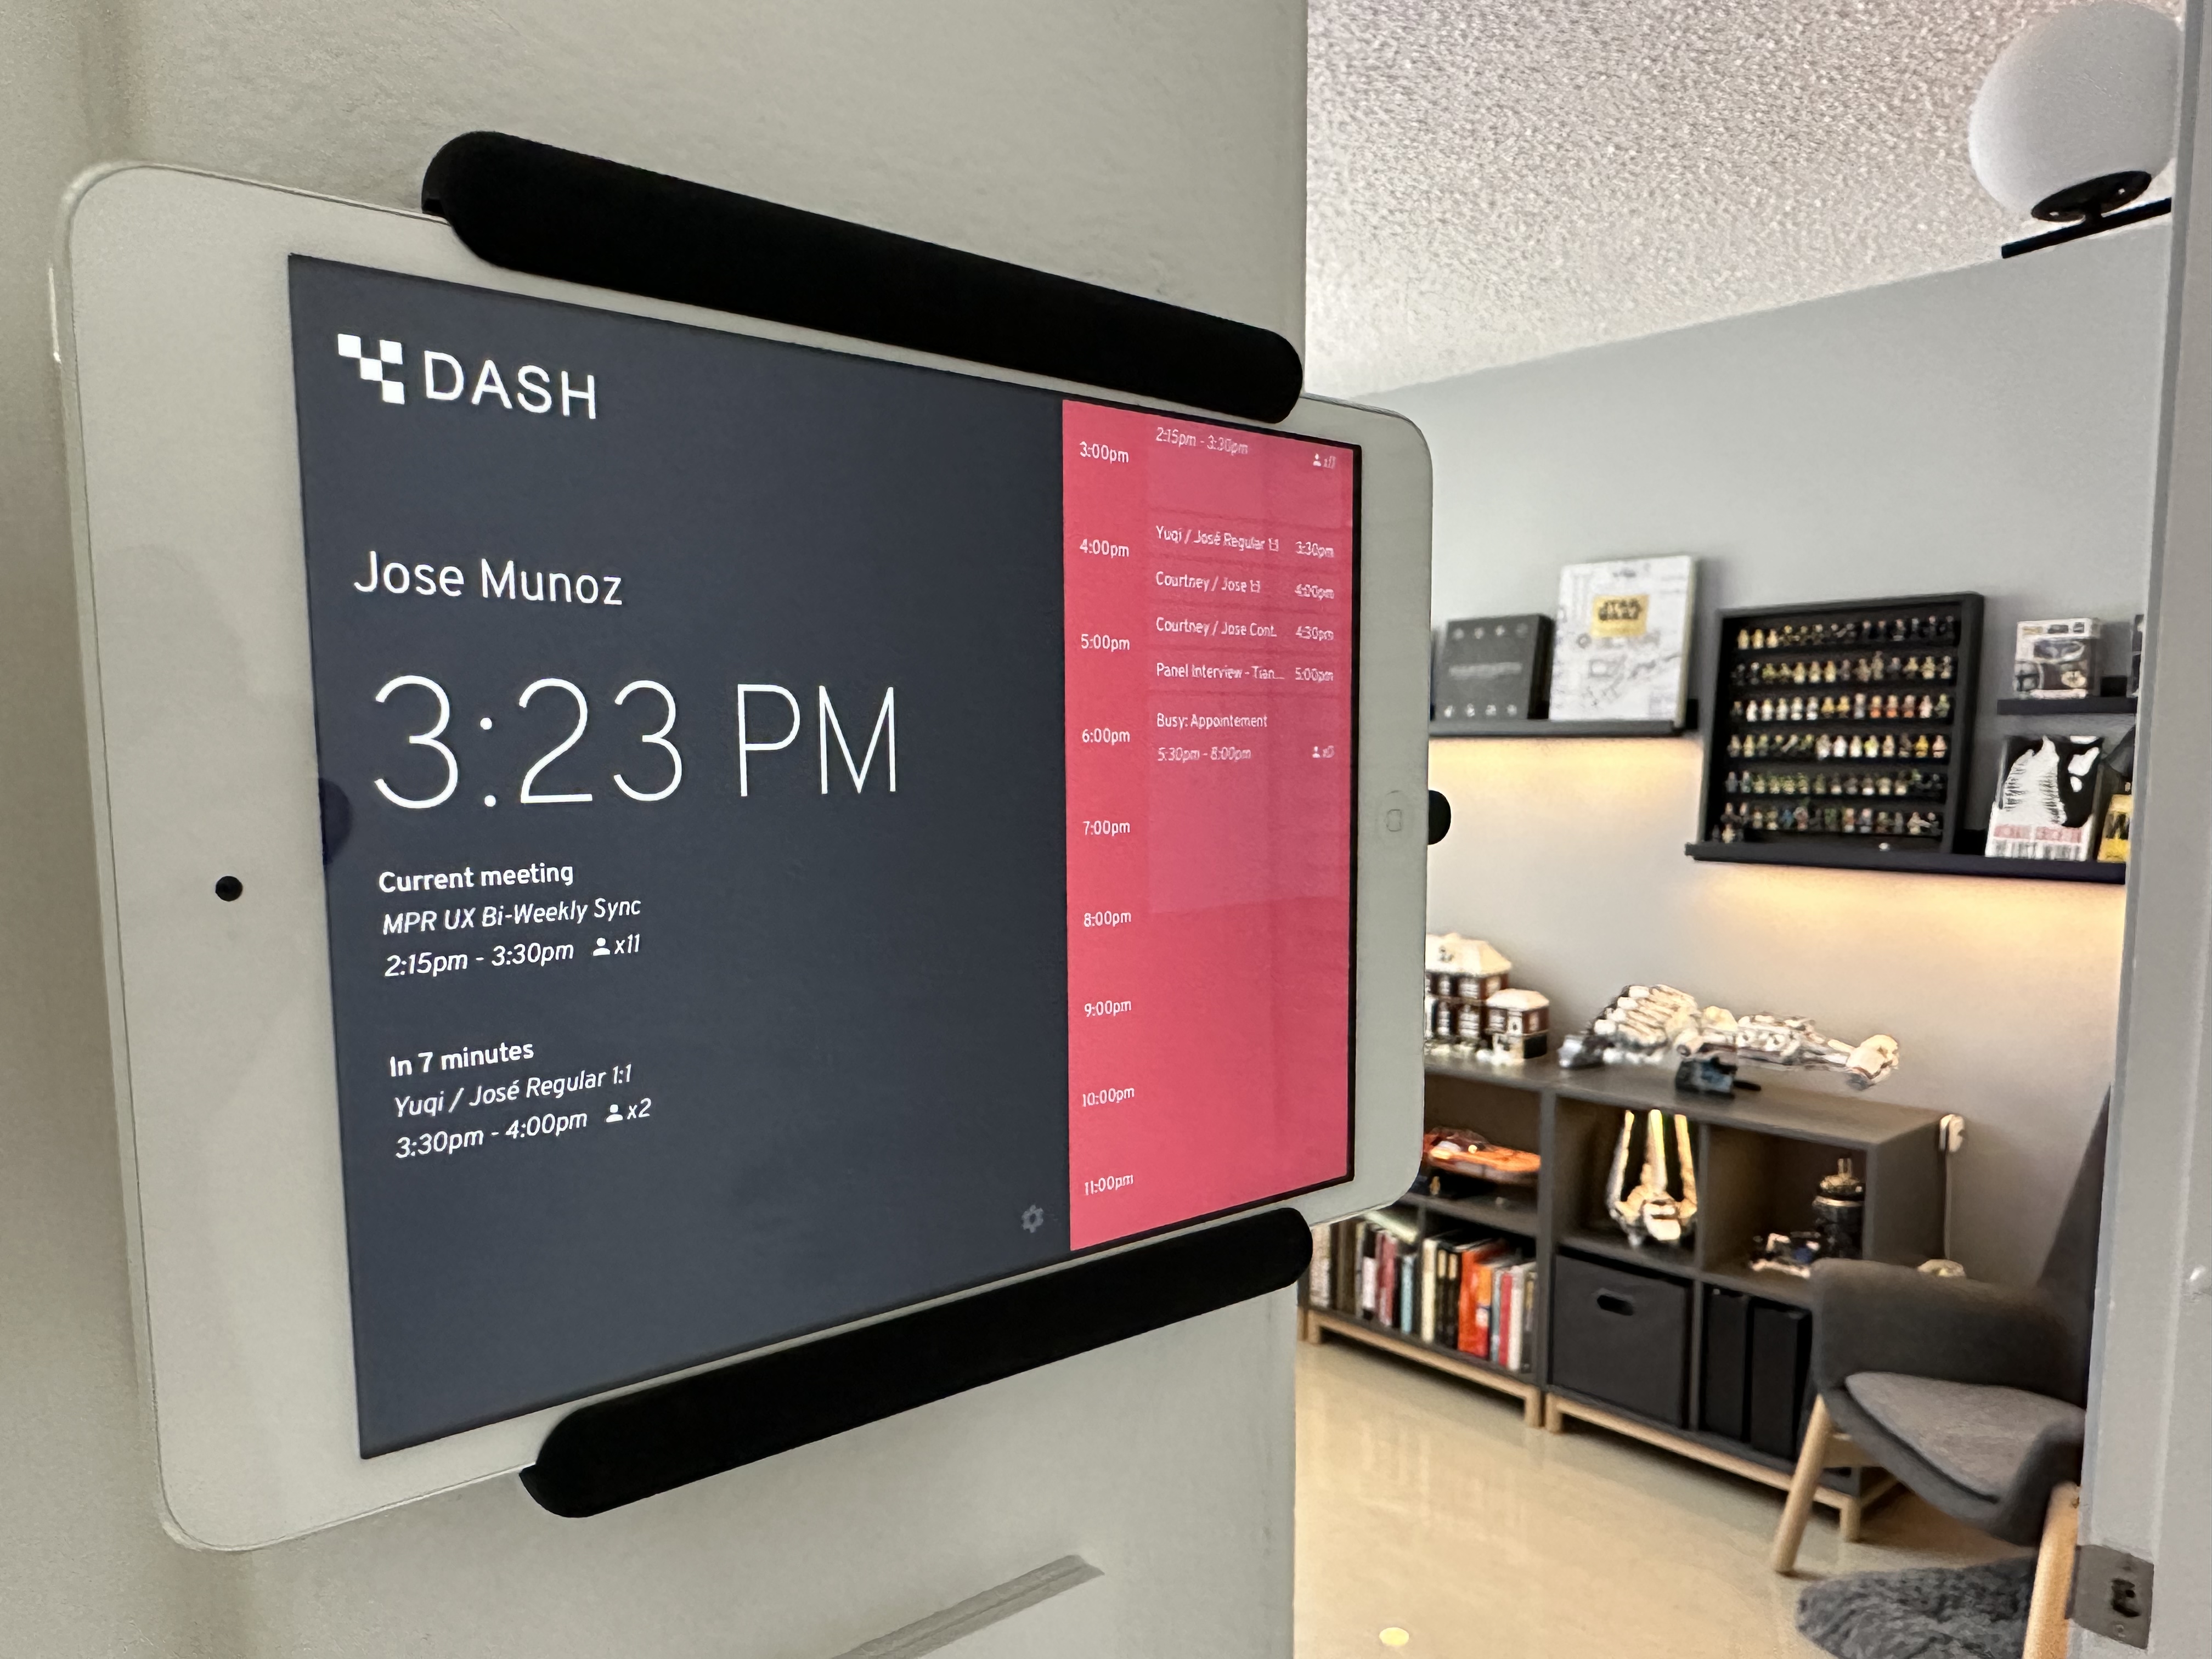
I ended up deciding on Dash. It had all the needed features, synced with Google Calendar, and showed a list view of the day's schedule. But my favorite part is that it has a different color depending on the status of the meeting. Gray if there is no meeting, yellow if it starts in 10 mins or less, and red if there is an ongoing meeting.
This is more than I could wish for an app that supports iOS 9 in 2023. I need to pray that the developer does not stop supporting iOS 9.

Update after more than two years of use
It has been two years, and this project has stood the test of time, and my wife and I use it daily. My wife uses it daily to review my schedule and know when I will be out of a call. I also use it often when I'm around the house to check the screen's color and know how much time I have left before a meeting starts. It is now part of my daily morning and shutdown rituals to turn on and lock the screen.
I’ve come to appreciate not buying new things immediately and trying to repurpose and give new life to otherwise obsolete devices, like old iPads.
There have been a few issues here and there. For example, I had to tweak the times for the automation a few times because sometimes I would wake up to a dead iPad. Also, from time to time, I had to log in to iCloud again and type the password on the iPad mini mounted to the wall. Apart from those things, the setup and the app work great. But overall, it has worked great.
For a future V2, I plan to replace the old iPad Mini with my current iPad Mini 6 when apple releases a new one. This will allow me to use Siri Shortcuts to automate the screen turning on and off. We’ll see what happens.
References:

UX Manager at BOLD from Puerto Rico. I write about Apple, smart home, desk setups, and productivity. I also co-run Cuevas Closet with my wife.
Thanks for reading! Subscribe to to get an email whenever I post or subscribe via RSS feed.


